
Appearance
Stock conversion
Goal
You need to change how stock is measured (for example, open a case into eaches) or change one stock item into another (for example, raw ingredients into a finished product), and keep the count and value right.
Where this happens
- In the back office (Core App): Stock Management → Stock Conversion. Tills do not run stock conversions.
Use Stock Conversion when you unpack a bulk unit into its sellable parts, or when you turn one stock item into another without going through a full sale.
Prerequisites
- Sign in to the Core App first — see Login. You land on the dashboard after choosing your store. Needs the right user permission. These menu items follow your user's permissions. If the item shows a restriction marker - or clicking it does nothing - your user does not have permission yet. Ask your franchise admin to grant it (see Who can do what (permissions)).
- You are signed in to the correct store.
- You have permission to use the Stock Conversion screen.
- You know the source item, the destination item or unit, and the quantity to convert.
- A supervisor is available when the conversion affects value (for example, breaking a case of beer into eaches, or cooking a raw ingredient into a finished item).
Steps
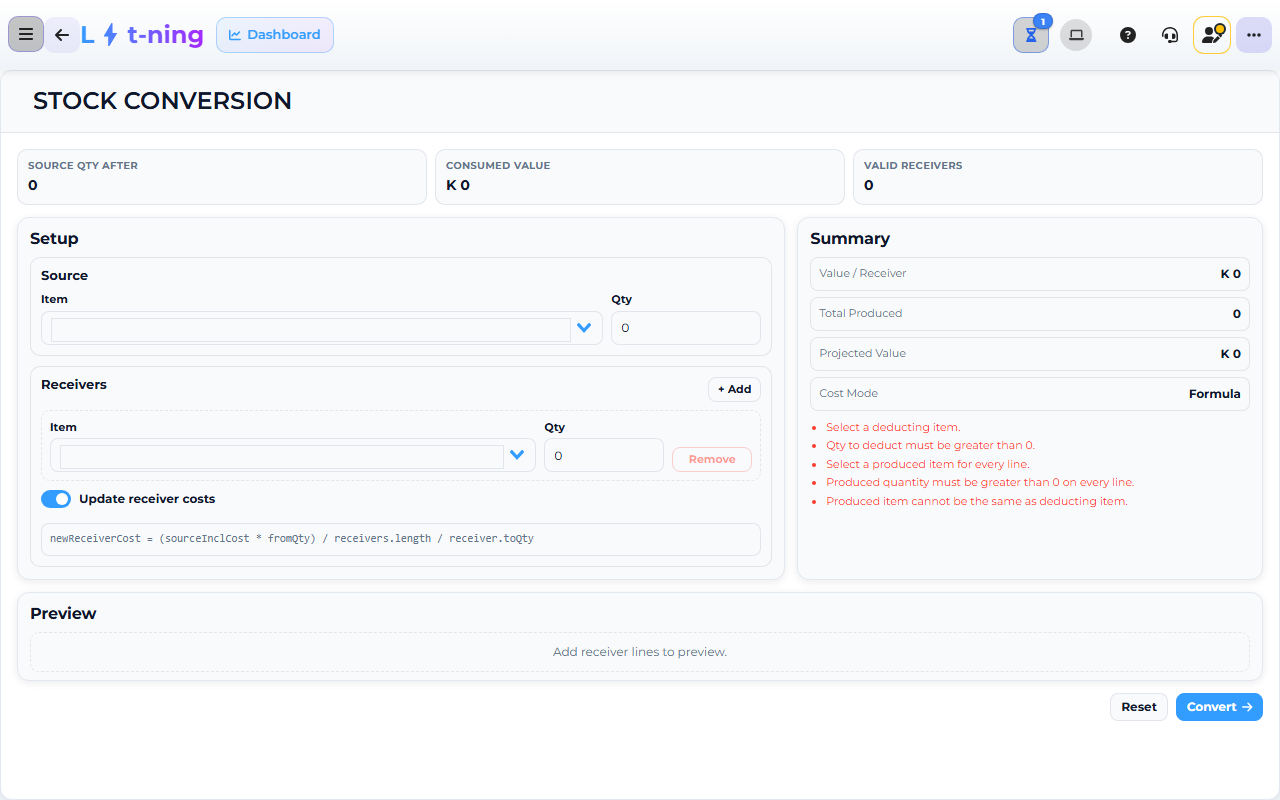
The image shows the Core App Stock Conversion screen. Screens may differ slightly by version.
1. Open Stock Conversion
- In the sidebar, expand Stock Management.
- Click Stock Conversion.
2. Choose the conversion type
Pick the option that matches what you are doing:
| Conversion type | When to use it |
|---|---|
| Unpack (case → each) | You are opening a bulk unit so the loose units can be sold or used. |
| Convert (item → item) | You are turning one stock item into another (for example, raw fish into a cooked portion). |
3. Pick the source item
- Click the Source Item field.
- Scan the barcode, or type the stock code or description.
- Confirm the item, unit, and current quantity before continuing.
4. Pick the destination item or unit
- For unpack, choose the destination unit (for example, each).
- For item → item, choose the destination item. If you are running a recipe, use the Production screen instead — see Production.
5. Enter the quantity and reason
- Enter the quantity you are converting.
- Pick a reason (Unpack, Recipe output, Wastage, Other) so the audit trail is clear.
- Add a note when the reason is "Other" or when a supervisor asks for one.
6. Save and confirm
- Click Save (or follow your franchise's save flow — the button name varies).
- Wait for the confirmation message that shows the source and destination quantities.
- Open the stock record for both items and confirm the new quantities match what you expected.
Expected result
- The source item count drops by the quantity you converted.
- The destination item or unit increases by the same quantity.
- The conversion has a reference number and a clear reason you can quote later.
Edge cases
- The source item is not in the list. Search by description; if it is still missing, the item may not exist for your store — ask your supervisor to create it.
- The destination unit does not appear. Ask a supervisor to enable the unit on the item record first.
- The quantities do not balance after conversion. Do not save a second conversion to "fix" the count — recount the source line and ask your supervisor.
- You need to convert using a recipe (for example, cooked fish). Use the Production screen, not Stock Conversion — see Production.
- You converted the wrong item. Tell your supervisor before you save another conversion. Reversing a conversion needs supervisor approval and a clear reason.