
Appearance
Purchase Orders
Updated walkthrough (September 2026)
Purchase orders are created through the supplier picker and the items screen, and are approved in bulk from the list — there is no separate "Send for Approval" or "Receive" button on the order. If your screen does not match the steps below, update your app or ask your supervisor.
Use this page when you need to raise a purchase order for a supplier, approve orders, or keep the paperwork for what you ordered.
Goal
You need to raise a purchase order against a supplier and track it from creation through approval — so receiving stock at the gate matches what was ordered.
Where this happens
- In the back office (Core App): Stock Management → Purchase Orders.
Purchase Orders are a back-office function. Cashiers do not see them on the till; supervisors and franchise admins do.
Prerequisites
- Sign in to the Core App first — see Login. You land on the dashboard after choosing your store. Needs the right user permission. These menu items follow your user's permissions. If the item shows a restriction marker - or clicking it does nothing - your user does not have permission yet. Ask your franchise admin to grant it (see Who can do what (permissions)).
- You are signed in to the Core App as supervisor or franchise admin.
- The supplier record already exists (Supplier Management → Create Supplier).
- The stock items you want to order already exist (Stock Management → Create Item), or you are ordering new lines that will be created on receipt.
Steps
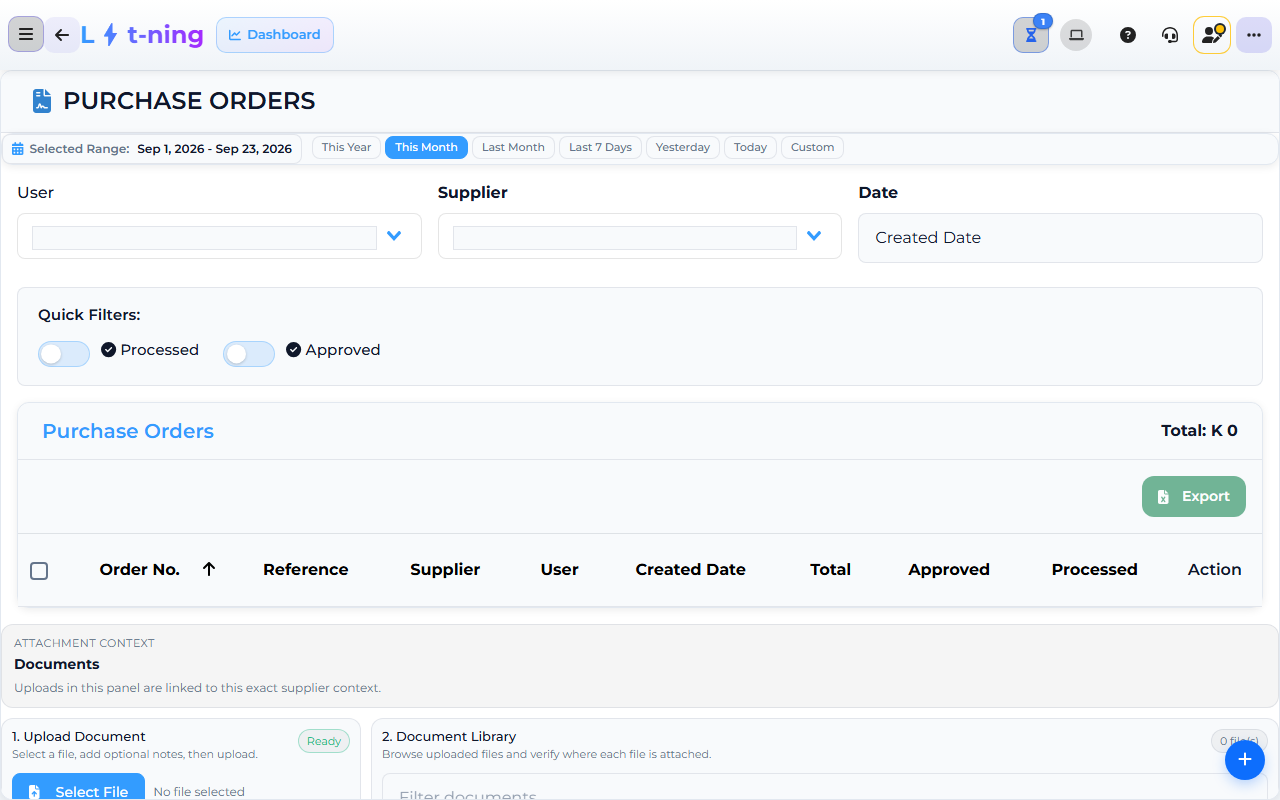
The image shows the Core App Purchase Orders screen. Screens may differ slightly by version.
1. Open Purchase Orders
In the Core App sidebar, open Stock Management → Purchase Orders. Use the Processed and Approved switches and the search to filter the order list.
2. Create a purchase order
- Click the floating + button. The Create a Purchase Order box opens.
- Pick the Supplier — type to search the supplier list, then confirm.
- The app opens the items screen with the supplier preselected. Add each item and the quantity you are ordering, then save — this is the same items screen used for receiving stock (GRV), so ordering and receiving share one flow.
3. Edit an order
- Click the order in the list. The Edit Purchase Order box opens.
- Change the reference text or the expected delivery date.
- Save — the app confirms the order has been updated.
4. Approve orders
- Tick the orders you want to approve.
- Click Approve.
- The app reports Approval Complete and how many orders were approved.
5. Receive the order
When stock arrives at the gate, receive it through Stock Management → Receive Stock / GRV: pick the supplier, then scan or add the items on the delivery. The purchase order paperwork stays on the Purchase Orders screen, and each order can keep its documents (quotes, delivery notes) in its Documents box.
Expected result
- The order list shows what was raised, with the Processed and Approved filters to separate new orders from handled ones.
- The supplier and lines match what was agreed.
- Receiving against the supplier updates the GRV record and stock on hand.
Edge cases
- You cannot find the supplier. Create the supplier first under Supplier Management → Create Supplier — do not type the name freehand on the purchase order.
- An item is missing from the order. Add the line before the goods arrive; the delivery is received line by line against the GRV.
- The delivery is short. Receive the actual quantity on the GRV; raise a new order for the balance if needed.
- You need the paperwork with the order. Open the order's Documents box to attach or download quotes and delivery notes.