
Appearance
Suppliers
Goal
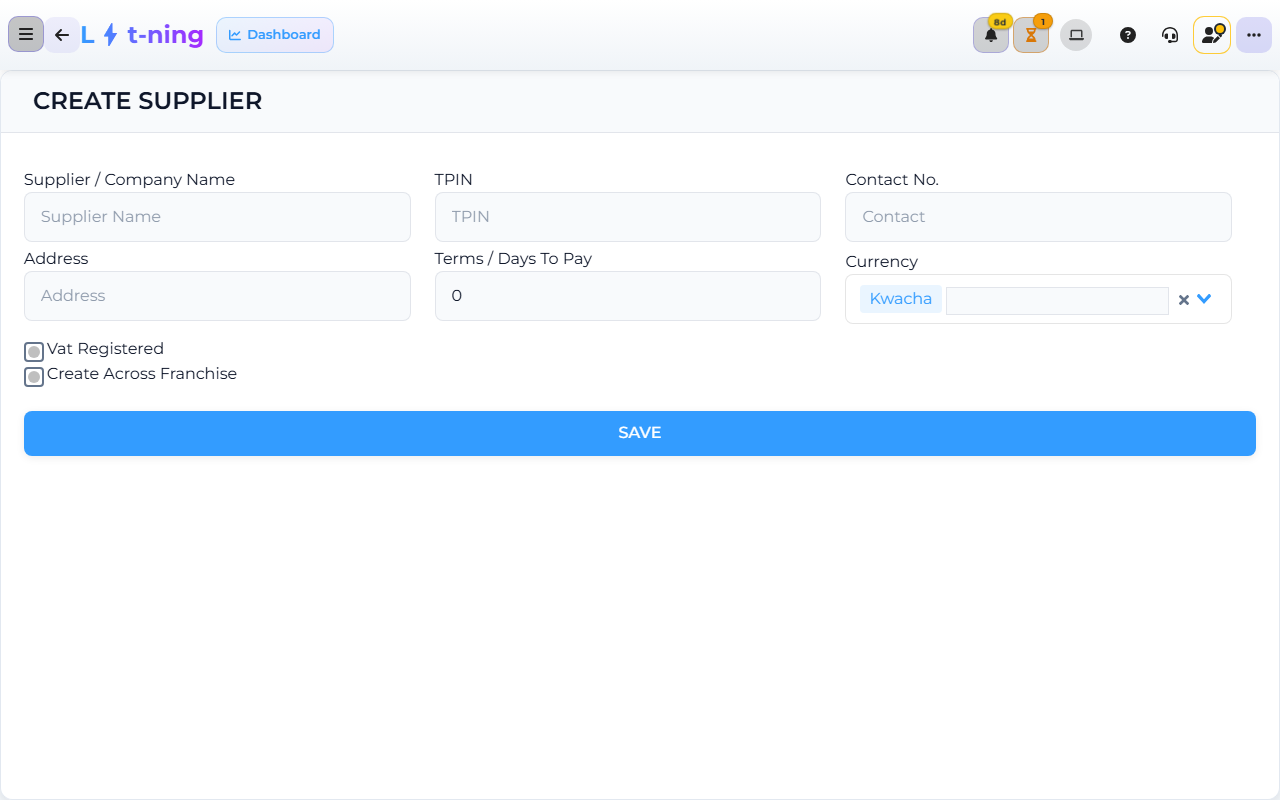
Core App demo store — screens may differ slightly by version.
Create, find, update, and document supplier records so purchasing, GRV receiving, and document storage all use the right account.
Where this happens
- In the back office (Core App): Supplier Management group (top-level) — Create / Edit Supplier, Documents.
Use this page to create, find, update, and document supplier records.
Problem
You need a supplier ready for purchasing, receiving stock, or keeping documents with the right account.
Prerequisites
- You have permission to manage suppliers.
- The supplier's approved trading name and contact details are available.
- You have checked that the supplier is not already in the list.
Steps
- Open Supplier Management and choose Edit Supplier — this opens the Select Supplier screen.
- Search by supplier name before creating a new record.
- If no match exists, go back to Supplier Management and choose Create Supplier.
- Enter the approved supplier name, contact details, payment terms, and any required tax information.
- Review spelling and numbers carefully, then click Save.
- When an approved detail changes, open the record from Edit Supplier and update it in the Supplier Workspace.
- In the workspace, use the Documents section to attach delivery notes, agreements, or other approved records.
Pay a supplier and clear a balance
A supplier balance is cleared from the supplier's own record in the back office — you do not have to wait for head office. The Supplier Workspace is in three bands: Statement Actions at the top (export or send the statement), Account Profile in the middle (the supplier's details and the Standard Payment button), and the Operations Hub below it (the working boards — GRVs, Purchase Orders, Other Invoices and GRV Returns under Procurement, and Payments under Settlements).
Pay a GRV you have received
- In the sidebar, expand Supplier Management, choose Edit Supplier, then open the supplier. The Supplier Workspace opens on that supplier's account.
- Set the operations range before you read anything: choose This Year, This Month, Last Month, Last 7 Days, Yesterday, Today or Custom. The range decides which GRVs and payments the boards show.
- In the Operations Hub, open the GRVs board and the Finalized GRVs list. Each row carries the GRV Number, the Invoice Number (Reference), the Date, the Amount and who created it.
- On the row you are paying, use the pay action in the Action column — the last button in that column, shown as a banknote icon on a desktop screen and as Pay on a phone or tablet.
- The Pay for GRV? prompt appears and shows the invoice number of that GRV. Read it before you go on, then choose Yes to continue (or No to stop).
- The Make GRV Payment box opens. It shows the GRV number and asks for the Payment Method — the account the money left from. If your store captures petty cash payments it also asks for a Payment Reason and an Account Type.
- The amount paid is the amount on that GRV, so the supplier's balance drops by the GRV amount and that GRV stops showing as owed.
Pay an invoice that is not a GRV
Use Standard Payment in the Account Profile band instead. It opens Capture Supplier Payment, where you enter:
- Payment Amount — how much you are paying now.
- Payment Date — when the money moved. It is fixed to the current time unless your role allows back-dating.
- Invoice No. — the supplier invoice this payment settles. The payment is allocated to the invoice number you type, so check it against the invoice the supplier gave you.
- Payment Method — the account the money left from.
- Payment Reason — what the payment was for.
Check the balance dropped
- Choose Refresh at the top of the workspace, or reopen the supplier.
- The balance in the Account Profile band must now be lower than it was, by the amount you paid.
- Open the Payments board under Settlements. It lists what has been paid to this supplier, with the invoice number, the amount and the date. Your payment is the newest row.
- If the balance has not moved, work through the edge cases below before you raise it. If you do need to raise it, gather what is listed under Before you open a ticket.
Head office can pay on your behalf
If your store belongs to a franchise and head office pays the supplier directly, the payment is made in Central GRV Management instead: open Stock Management → Central GRV Management, work on the Pending tab, and use the row's Pay action to open Make GRV Payment. Head office uses that one screen for every supplier in the group, so the store only sees the payment on the statement once head office records it.
Expected result
The supplier can be selected on purchasing and GRV screens, and the record contains current approved details.
Edge cases
- A similar supplier already exists. Do not create a duplicate. Open the existing record and ask a supervisor to confirm it.
- The supplier is not available on a GRV. Save no delivery against a different supplier; correct the supplier record first.
- A contact detail changed. Edit the existing record and keep the old document history intact.
- A document contains private payment information. Follow your store's document policy before attaching it.
- The supplier still shows as owing after a payment. The payment was not allocated to the GRV. Pay from the GRV row so the amount comes off the GRV itself, or type the exact invoice number in Capture Supplier Payment — a payment with the wrong invoice number still shows against the supplier, but not against the document that is owed.
- The supplier balance is negative. The account is in credit: more has been paid to the supplier than the supplier has invoiced. Open the Ledger board under Settlements to see the entries that created it, and check the GRV Returns board for a return you may already have credited. A negative balance is a question for your supervisor, not a payment to make.
- You cannot find where to capture a supplier payment. It is on the supplier's own record: Standard Payment in the Account Profile band of the Supplier Workspace for an invoice, or the pay action on a finalized GRV row in the GRVs board for a GRV.
- The workspace has a Make Payments button but you cannot see it. On this version the Make Payments button sits inside a dialog that does not open on its own, so it never appears on screen. Use the pay action on the GRV row instead — it opens the same Pay for GRV? prompt.
Before you open a ticket
- The supplier's name
- The amount you tried to pay and the date you tried to pay it
- The GRV number or invoice number the payment was meant to settle
- A screenshot of the supplier statement before the payment
- A screenshot of the supplier statement after the payment